
Virtual Staging Examples: 12 Before-and-After Room Transformations
Introduction
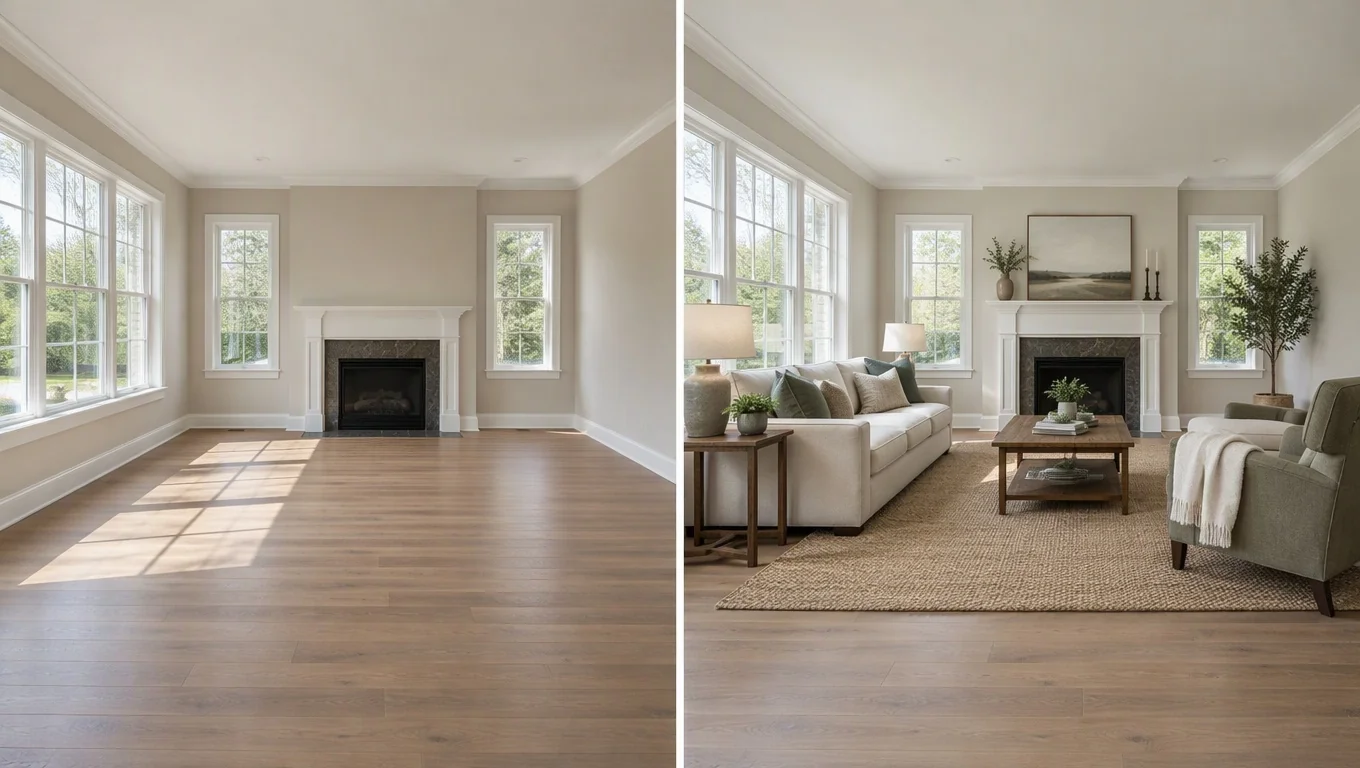
Virtual staging examples are the quickest way to answer the question you actually care about: do AI-furnished rooms look real enough to trust? The short answer is yes. When the starting photo is a clean, empty room and the furniture is scaled to the space, a good before-and-after transformation reads like an ordinary interior photo, not a collage.
This guide walks through 12 virtual staging examples organized by room type, so you can see exactly how an empty living room, a bare bedroom, or a blank studio turns into a furnished space you can picture living in. Every example here is an empty-room-to-furnished transformation. Nothing repaints a wall, swaps a floor, or changes a fixture. The change is entirely movable furniture and decor added to the room you already have.
By the end, you will know what a believable staged room looks like, why examples help you decide, and how to create your own preview from a single photo, whether you are moving into a new home, starting fresh, or planning before the furniture arrives.
Key Takeaways
- Virtual staging adds furniture to empty rooms. It does not renovate, repaint, or replace anything built into the space.
- Before-and-after examples reveal realism fast. Watch for correct furniture scale, natural shadows, and matching light direction.
- Room type changes the playbook. Living rooms need conversation zones, bedrooms need clear walking paths, and studios need furniture that divides one room into areas.
- You can test it on your own photo. A single clear daylight shot of an empty room is enough to generate a furnished preview.
- Examples are a decision tool. They help you preview furniture choices before you spend money or commit to a layout.
What Are Virtual Staging Examples?
Virtual staging examples are paired images: a photo of an empty room on one side, and the same room digitally furnished on the other. The furnished version keeps the real walls, windows, flooring, and proportions. Only movable pieces like sofas, beds, rugs, and lighting are added. That is the whole point of the technique, and it is why the results can look so natural.
If you want the full background on how the process works and where it fits, our plain-English guide to virtual staging breaks down the basics for homeowners. Here, the focus is narrower: what believable staged room examples actually look like, side by side.
A strong example has three qualities. First, the empty starting photo is clean and well-lit, so the AI has a clear canvas. Second, the added furniture matches the room's real light, with shadows that fall in the same direction as the windows. Third, the scale is right: a sofa sits at a human-sized proportion against the wall, not floating or oversized. When those three line up, the before-and-after looks like two photos of the same room taken a week apart, not a digital mashup.
Because the technique only adds furniture, it works best for spaces that are genuinely empty, like a just-handed-over apartment, a room cleared for a move, or a home you are furnishing from scratch.
Why Before-and-After Examples Help You Decide
Most people researching virtual staging are visual-first. You do not want a description of realism. You want to see it and judge for yourself. Before-and-after examples do exactly that. They let you compare the raw room to the finished result and decide whether the output clears your personal bar.
Examples also solve a practical problem. Furnishing a room is expensive and hard to undo, and most furniture retailers charge restocking or return shipping fees, so buying the wrong sofa is a costly mistake. Seeing a furnished preview first lets you test layouts and styles without committing a dollar.
The best way to move from browsing examples to your own result is to test it on a real photo. You can upload a shot of your empty space to a virtual room designer and watch your own before-and-after appear, rather than relying on someone else's sample room. That turns a gallery into a decision you can actually act on, with your room, your dimensions, and your style.
12 Virtual Staging Examples by Room Type
Here are 12 before-and-after examples grouped by room type. Each one starts from an empty room and ends fully furnished, with no wall, floor, or fixture changes anywhere. Use the table for a quick scan, then read the notes for what makes each transformation work.
| # | Room Type | Empty Starting Point | Furnished Result |
|---|---|---|---|
| 1 | Living room | Bare open-plan lounge, wood floor | Sectional, area rug, coffee table, floor lamp |
| 2 | Living room | Small square room, one window | Two-seat sofa, slim console, accent chair |
| 3 | Living room | Long narrow room | Sofa plus loveseat facing each other |
| 4 | Living room | Corner room, two windows | L-shaped sofa angled to the view, TV stand |
| 5 | Bedroom | Empty primary bedroom | Queen bed, two nightstands, bench, dresser |
| 6 | Bedroom | Small guest room | Full bed, single nightstand, reading chair |
| 7 | Bedroom | Kids' room | Twin bed, low storage, soft rug |
| 8 | Bedroom | Room with sloped ceiling | Low platform bed, compact side tables |
| 9 | Studio | Blank open studio | Bed zone, sofa zone, rug-defined dining nook |
| 10 | Studio | Micro-studio, one large window | Daybed, folding table, wall shelving |
| 11 | Studio | L-shaped studio | Sleeping alcove, lounge, slim desk |
| 12 | Studio | Loft-style studio | Zoned living, dining, and work areas |
Living room examples (1–4)
Living rooms show off virtual staging best because they have the most furniture to arrange. In examples 1 through 4, the transformation always keeps the same conversation logic: seating faces seating, a rug anchors the group, and walking paths stay clear. Notice how the small square room in example 2 uses a two-seat sofa and a slim console instead of a bulky sectional. Right-sized pieces are what make a modest room feel livable rather than crowded.
If you are staring at a blank lounge and not sure where to begin, our walkthrough on decorating an empty living room from scratch pairs well with these examples. The before-and-after images show the destination; that guide shows the steps.
Bedroom examples (5–8)
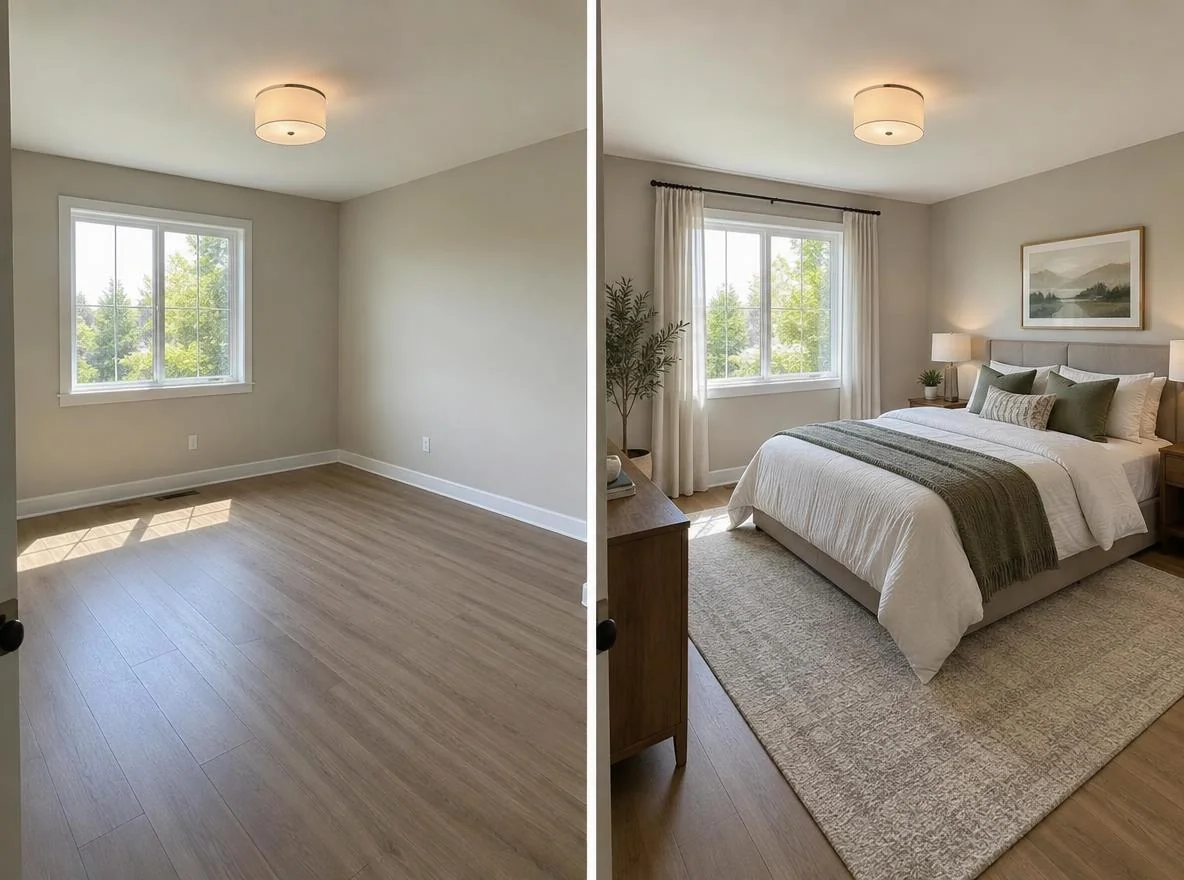
Bedroom transformations are calmer and more repeatable. The winning formula in examples 5 through 8 is simple: bed centered on the longest wall, balanced nightstands, and at least 24 inches of walking clearance on the sides. The sloped-ceiling room in example 8 swaps a tall headboard for a low platform bed so the furniture fits the ceiling line, a good reminder that scale beats style when space is tight.
Studio examples (9–12)
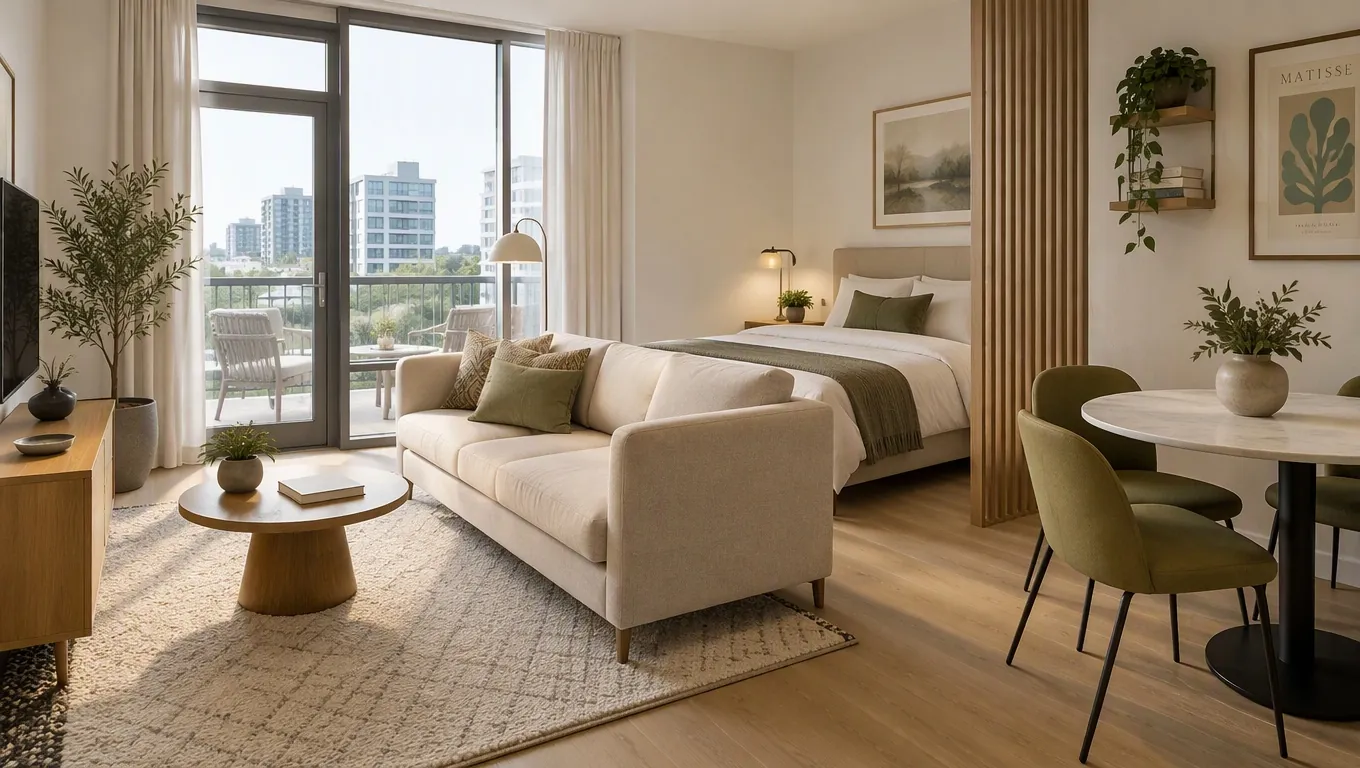
Studios are the hardest to picture empty and the most satisfying to stage, because one room has to become several. In examples 9 through 12, furniture and rugs do the dividing work: a rug marks the dining nook, a sofa back separates the lounge from the sleeping area, and a slim desk claims a corner. Nothing structural changes. The zones are created entirely by where the movable pieces land.
See Your Empty Room Fully Furnished in 30 Seconds
Upload one photo of your empty room and get a realistic furnished preview in the style you choose — before you buy a single piece of furniture.
Free to try • No design skills needed • Works with any room photo
Furnish My Room →Best Practices for Realistic Staged Room Examples
Whether you are judging someone else's examples or making your own, the same signals separate a believable before-and-after from an obvious fake. Use this checklist as your quality bar.
- Start with a clean empty photo. Shoot in daylight, hold the camera at chest height, and capture two full walls so the room's proportions are clear.
- Match the light. In a good result, furniture shadows fall the same direction as the window light. Mismatched shadows are the fastest tell of a poor stage.
- Respect scale. A sofa should reach roughly two-thirds of the wall it sits against, and a bed should leave visible floor around it.
- Keep walkways open. Realistic rooms have paths. Aim for about 30 inches of clearance in main routes and 18 inches between a sofa and coffee table.
- Choose one coherent style. A single warm, livable style reads more real than a mix of clashing trends.
If you want a repeatable process for producing these results yourself, our step-by-step guide on how to virtually stage a room for free covers photo prep and settings in detail. The examples above are the target; that guide is the how.
One more practical tip: stage the same empty room in two or three styles and compare them side by side. Seeing your space as cozy-modern versus warm-traditional makes the decision obvious in a way that scrolling catalog photos never does.
Common Mistakes to Avoid
Even good tools produce weak examples when the inputs are wrong. Watch for these pitfalls when you create or evaluate staged room examples.
- Expecting renovation, not staging. Virtual staging adds furniture to empty rooms. It will not change wall color, flooring, or cabinets, so judge examples on furnishing quality, not remodeling.
- Using a cluttered or already-furnished photo. The technique shines on empty rooms. A room that still has old furniture gives the AI nothing clean to work with.
- Dark or angled starting shots. Poor lighting and extreme angles distort proportions and make furniture placement look off.
- Overfilling the room. More furniture is not more realistic. The best examples leave breathing room.
- Ignoring room type logic. A studio needs zones; a bedroom needs clearance. Applying living-room habits to every space produces awkward results.
Final Thoughts
Virtual staging examples work best as a decision tool, not just eye candy. By comparing empty rooms to their furnished results across living rooms, bedrooms, and studios, you can see for yourself that AI staging looks convincing when the photo is clean, the scale is right, and the light matches. The 12 before-and-after transformations here all follow one honest rule: furniture and decor change, the room itself does not.
The real payoff comes when the example is your room. Take one clear daylight photo of your empty space, generate a furnished preview, and compare a couple of styles before you spend anything. These virtual staging examples show the destination. The CTA below gets you your own before-and-after in seconds.
Frequently Asked Questions
Do virtual staging examples look real?
Yes, when the starting photo is a clean, well-lit empty room and the furniture is scaled correctly. In a strong before-and-after, shadows match the window light and pieces sit at human-sized proportions, so the result reads like an ordinary interior photo rather than a collage.
Does virtual staging change walls or floors?
No. Virtual staging only adds movable furniture and decor to a photo of an empty room. It does not repaint walls, replace flooring, change cabinets, or alter anything built into the space. Every example in this guide keeps the room's real surfaces exactly as they are.
What room types work best for virtual staging?
Empty living rooms, bedrooms, and studios all stage well. Living rooms show the most furniture arrangement, bedrooms follow a simple bed-and-nightstand formula, and studios benefit most because furniture and rugs can divide one open room into distinct zones.
Can I create my own before-and-after example?
Yes. Take one clear daylight photo of your empty room, capturing two full walls, and upload it to generate a furnished preview. You can try several styles on the same room and compare them side by side before choosing.
Is virtual staging cheaper than physical staging?
Generally, yes. Physical staging involves renting and moving real furniture, while virtual staging works from a single photo. Most people find it far cheaper and faster, which is why it is popular for previewing furniture before making a purchase.


